General Updates

Alright, so we’ve worked on a few projects over the last couple of weeks. And with this rollercoaster weather it gave us a nice variety of things to do.

Two weeks ago when it was snowing we stripped some more paint. Patrick worked on the last bit of dining room base molding and I worked on some detail by the kitchen door. I think with Patrick finishing the base molding the only large surface painted areas remaining are the fire place mantle and the coffered ceilings. All the other work will be the painstaking detail pieces.
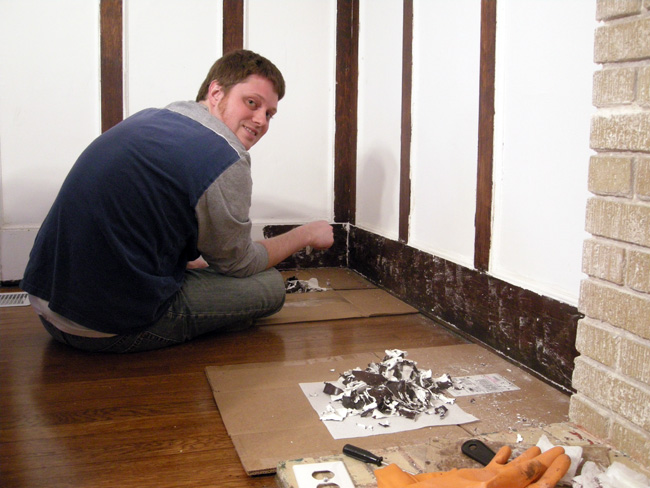
Dining room paint stripping

Then last weekend we had outstanding weather topping off at somewhere around 80F that made it ideal for some outside projects. For that matter it was almost getting too hot to work! I was finally able to tackle some of the leaves remaining from fall. Some people are really good about removing those as soon as they hit the ground. I’m the lazy one that waits to make sure that every last leaf has fallen before I bother removing any of them. One of my excuses is that they act as a protective winter blanket like mulch does, which is why I wasn’t removing them before. ;-) So now I’ve been able to put seven brown bags by the curb, fill up the compost with a ton of leaves, and still have about three quarters of the yard left to go.

So while I was busy raking leaves Patrick decided to tackle the remaining fence posts in the middle of our yard. When we bought the house there was a fence going through the yard– perhaps because of a dog? Back in November 2006 we tore out the wire portions. I love how my comment at the time was “Next up: the poles gotta go” – that was over two years ago, haha. So as you can see it’s taken us a while to get back to this one. Patrick pretty much struggled with it the majority of the workday. Oh how rewarding to get rid of that fence door!
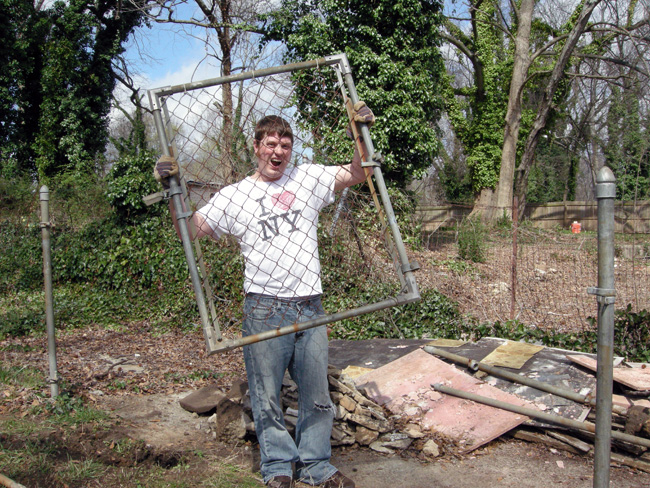
Tearing out fence gate

Those little buggers sure were cemented deep into the ground.
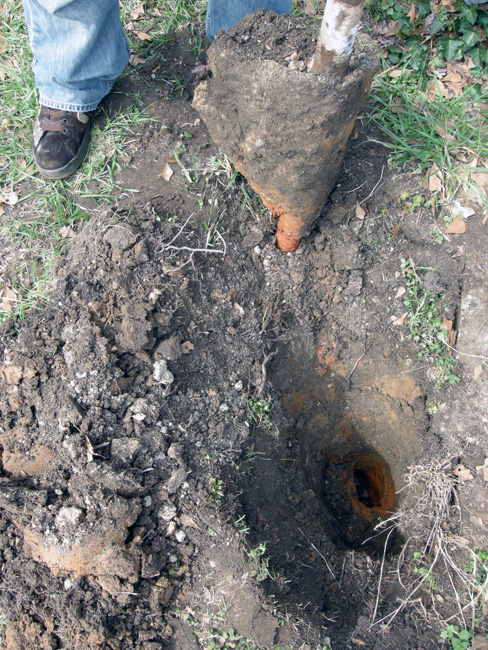
Fence hole

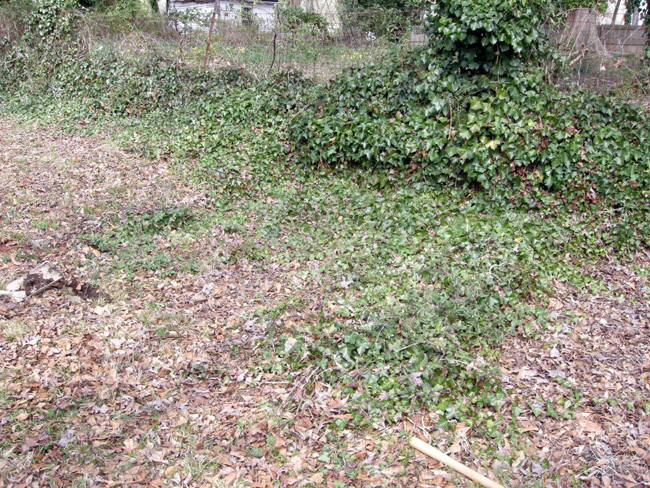
So once I was done raking the front lawn and parts of the back yard I decided to take on a piece of the garden being swallowed up by English Ivy. (I’m surprised its leaves don’t come with devil horns.) I guess this portion of the end of the driveway has been overlooked since it’s been hidden behind our pile of garbage that we have yet to get rid of. My excuse is that in the winter it’s too cold to work on this and in the summer you get eaten alive by the mosquitos and uhmmm, I don’t have an excuse for spring or fall, except that I’m tackling it now!

Covered driveway

*gasp* There is a wall hidden behind all that English Ivy! So after ripping out all the English Ivy I found about half a trash can full of junk – old beer bottles, old liquor bottles, clothes, rusty metal parts, Styrofoam, you name it. But underneath that was some wonderfully brown earth! I guess all those leaves that lay there for who knows how long composted themselves. The earth came in handy too to fill in the fence post holes.
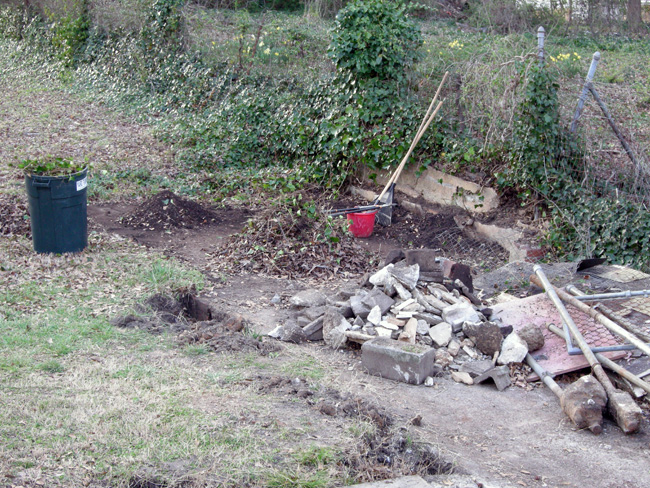
Uncovering driveway

Man we really need a dumpster.
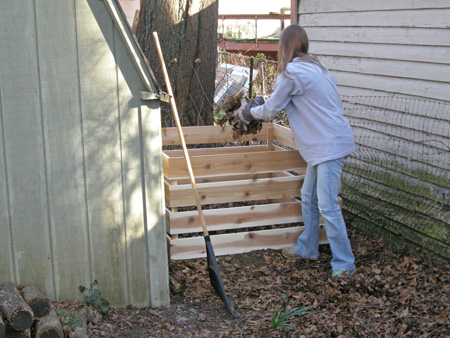
Posted in Gardening, Our Bungalow, Photos, Westview Bungalow | Tagged , | Comments Off on General Updates

Westview Bungalow Just Expanded!

Well… the website design expanded to take up more of your screen. The house is still the same size. But just look at all the extra space we have in here! Now we can make our photos larger and you don’t have to scroll so much to read the text.

Posted in General | Comments Off on Westview Bungalow Just Expanded!

Annual Snow Day

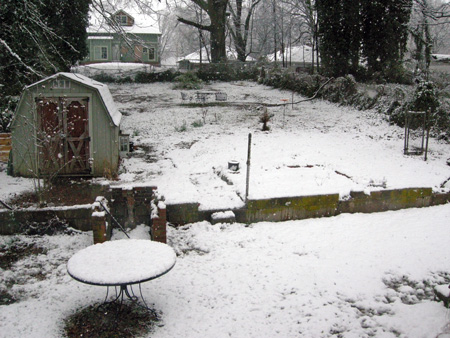
Here I was ready for March to bring spring. Apparently so were the plants because daffodils were already coming out and some trees were starting to show blooms. March 1st decided to take it back a step though – and SNOW!

Snow piling up in our backyard.

Snowed in back yard

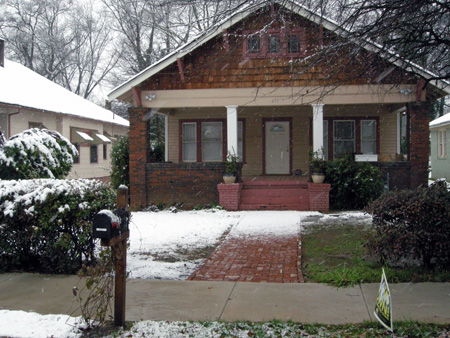
The front of the house. I think I was just slightly too late because some of the snow was already turning back to slush.

Westview Bungalow snowed in

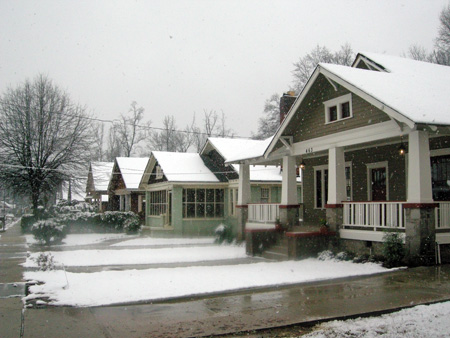
Awwww, look at the gorgeous houses in our neighborhood! I heart Westview!

East Ontario Avenue snowed in

So what do you do on a snow day? (Besides excitedly taking pictures, of course.) You go strip the dining room. Not that we ever stopped, but definitely an encouraging day to continue. Maybe one day all the work will actually look like we made progress again, because at this point all the time consuming detail work certainly won’t show in photos. Sorry folks!

Posted in Gardening, Our Bungalow, Our Neighborhood, Photos | Tagged , , , , , , , | Comments Off on Annual Snow Day

Composting for Newbies

We did it. We finally joined the composting culture.

Growing up in Germany composting was always such a natural thing. Just about everyone I knew had a little vegetable plot in their yard and a compost hidden somewhere in the corner of the garden. My parents always had a compost. Actually they must have been pretty serious because they had the three bin compost going on. I’m not sure what sparked my interest in wanting to do a compost here, but I told Patrick I thought it would be cool to start composting so we can have our own healthy earth for the garden. The space behind the garden shed seemed perfect because it will be pretty hidden back there. Patrick was game and ready to start. For that matter he was ready quicker than I was because he said “let’s just start a pile.” Being the German that I am I needed order…I needed a box to contain the pile in. So even though we didn’t have a box yet we added scraps to a pile. But the compost didn’t really become official in my eyes until we built the box today!

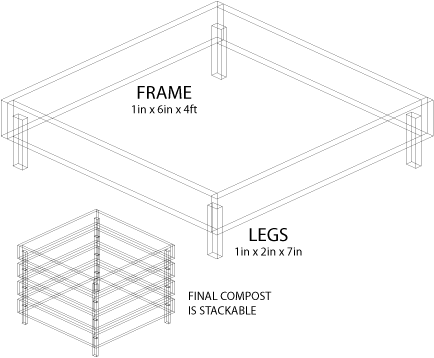
After some internet research we determined the easiest way would be the stacking method. You put the legs an inch lower than the boards so that one can be stacked on top of the other:

Compost Diagram

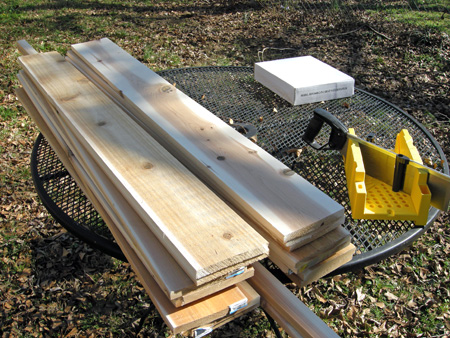
Patrick determined that even though it won’t be the cheapest method we should build it with cedar so it won’t weather as quickly. So off we went to the big box store and bought some 1″ x 6″ x 8′ cedar boards for the walls and 1″ x 2″ x 8′ for the supporting legs. Thankfully the big box store offers cutting, so we went ahead and got them cut in half (1″ x 6″ x 4′) so we wouldn’t have the extra work ourselves. The store had the super saw and was able to cut all eight boards in one go!

So here’s our pile of materials all ready to go!

Cedar wood for compost

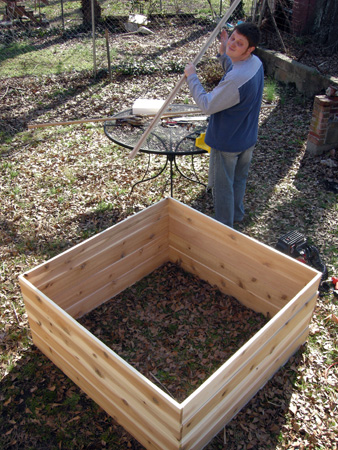
Step 1: Nail/screw together your boards to make a box.

Step 2: Cut the supporting legs into 7 inch pieces (1 inch larger than the boards to allow air flow). Attach legs to interior box walls.

Building cedar compost

Step 3: Stack your boxes on top of one another over the started compost pile hidden behind the shed.

Step 4: Throw in some leaves that you haven’t cleaned since fall for good measure.

Composting leaves

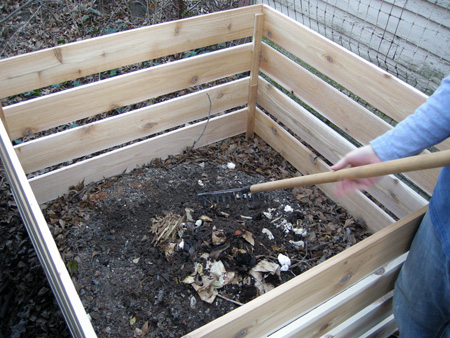
Step 5: Mix up the pile of kitchen waste and leaves.

Step 6: Keep adding to pile and repeat steps 3 through 6 until your waste turns into earth. (Or so we’re told.)

Raking compost

Since we’re composting virgins we’re obviously curious what our mess will turn out to be. I understand not too much will probably happen until the temperature goes up a bit more. We also bought one of those earth test kits. I haven’t actually used it yet. That way we’ll hopefully be able to find out what our compost pile will need most of to neutralize the existing earth in the garden. Wish us luck in our new venture!

Posted in Gardening, Our Bungalow, Photos, Westview Bungalow | Tagged , , , , , , , , , , | Comments Off on Composting for Newbies

Fireplace Paint Removal Update

We finished paint removal with PeelAway on the brick and tile of the fireplace last night. Well, or at least the front. I suppose we didn’t do the thin strip on each side.

So this is the result we got after using the PeelAway one time. You can tell how we did it in sections because the PeelAway hardened more at the edges. You can also tell we were in a hurry in the top left corner! We removed it, but had to leave to go to a BeltLine meeting and weren’t able to do our usual thorough cleaning. As we progressed with each section we tried various methods of after-PeelAway-cleaning. Initially we used the sponge method and lots of towels and switching out water. Towards the end we used a spray bottle and a dust pan to catch the drippings. Then we’d use a little nylon brush to rub off the remains in the cracks as best as possible, as well as our metal scrapers to get things out of the cracks.

Using the PeelAway on the extremely textured brick versus on the flat tile was definitely a different experience. The texture takes a lot of work because there are just so many places the paint is able to stick to. The flat surface was really rather quick. The paint never truly “peels away” like the product title seems to indicate. If you think you can remove the waxy paper with your pinky and all the paint will just magically stick to it and be gone then well…perhaps you should either not remove the paint, or hire someone to do the work for you. This will definitely still require some scrubbing and cleaning and work, but I think it helped a lot and we were probably able to cover a larger area quicker than we would have with the KleanStrip. Obviously the more textured the area, the harder the work will be. So overall we’re very happy with the results from the PeelAway.

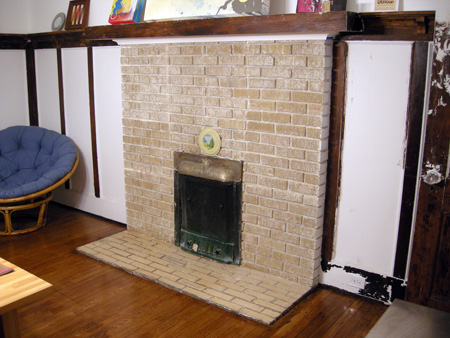
Result after one-time PeelAway use:

Fireplace after PeelAway

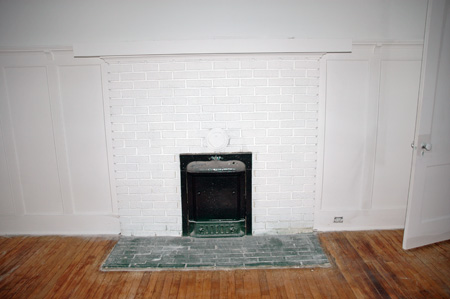
The fireplace when we bought the house (where someone had gone white-paint-happy, and before we refinished the floors):

Fireplace before PeelAway

Thankfully my sister is coming in town for a visit today, so it will give our fingers time to recuperate and will give our mind some time off because otherwise we may have started getting burned out on the project. (There are only so many days in a row you can work on the same thing before you get worn out and need a break.)

So the next steps will be to apply the PeelAway on the metal cover. We have worked on it with KleanStrip on a previous occasion, so we already know it should be a brass cover. We’re curious though if we will uncover any additional details! (We’ll show what we’ve uncovered this far when we work on it some more.) Then we have to also remove the paint from the brick on each side of the fireplace. Lastly we’ll probably use KleanStrip to go back and try to remove some of the leftover paint, like where the seams show, or where we ran out of time to properly clean the area. But we’re really excited about how good this looks already!

Posted in Before and After, Our Bungalow, Photos, Westview Bungalow | Tagged , , , , , , , , , | Comments Off on Fireplace Paint Removal Update